- WebsiteBaker
- API
- Google Drive
- Google Sites
- Yahoo SiteBuilder
- Issue
- Mobile
- Customizing
- Tutorial
- Watermark
- Free Download
- Crack
- Dreamweaver
- Xara
- Coffeecup
- Blogger
- Iweb
- Wordpress
- Video Tutorial
- Weebly
- PHP
- ASP.NET
- Joomla
Slider Demos
-
 wordpress slider
Rhomb Template
with Cube Over Effect
wordpress slider
Rhomb Template
with Cube Over Effect
-
 slideshow javascript
Easy Template
with Page Effect
slideshow javascript
Easy Template
with Page Effect
-
 html slideshow
Silence Skin
with Blur Animation
html slideshow
Silence Skin
with Blur Animation
More Demos: Bootstrap carousel, Slick slider, Bootstrap slider, HTML slider, Slick carousel, Bootstrap carousel, HTML slideshow, CSS Slideshow, jQuery carousel, Image carousel
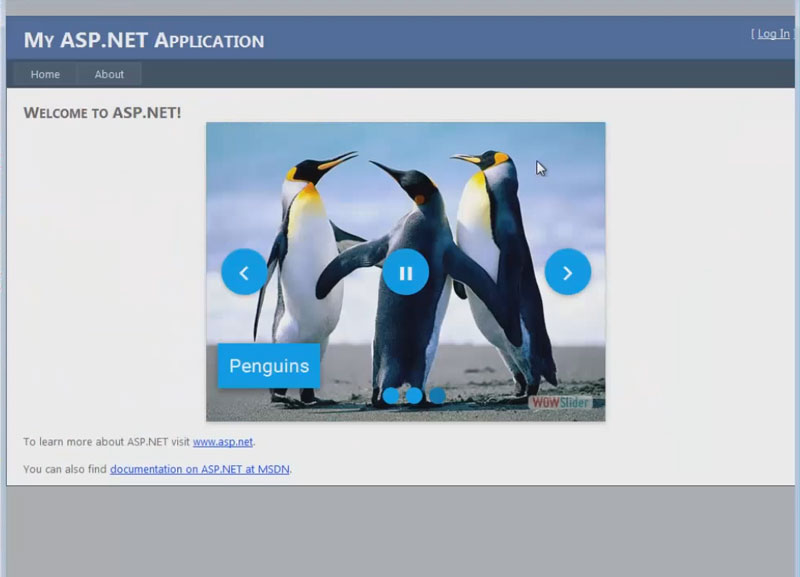
How to add WOW Slider to an ASP.NET web page
Your slideshow should be ready. See another tutorials to understand how to create a slideshow in a WOWSlider application.
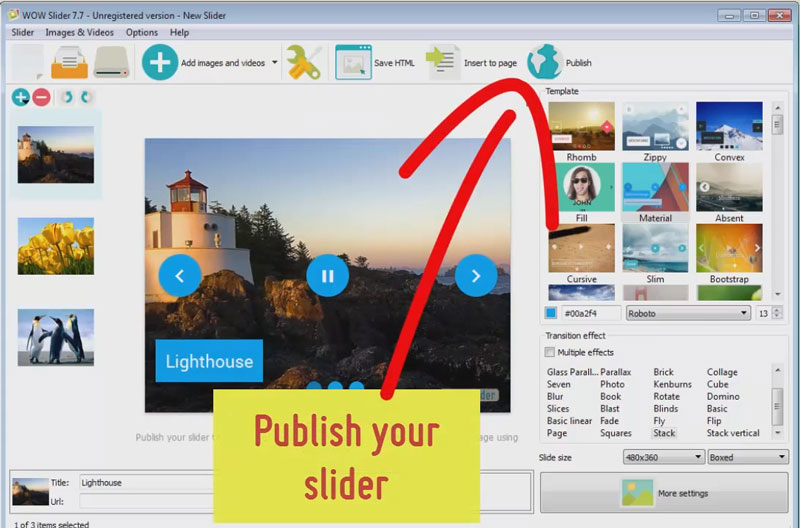
Click 'Publish' button in the top-right side of your application window.
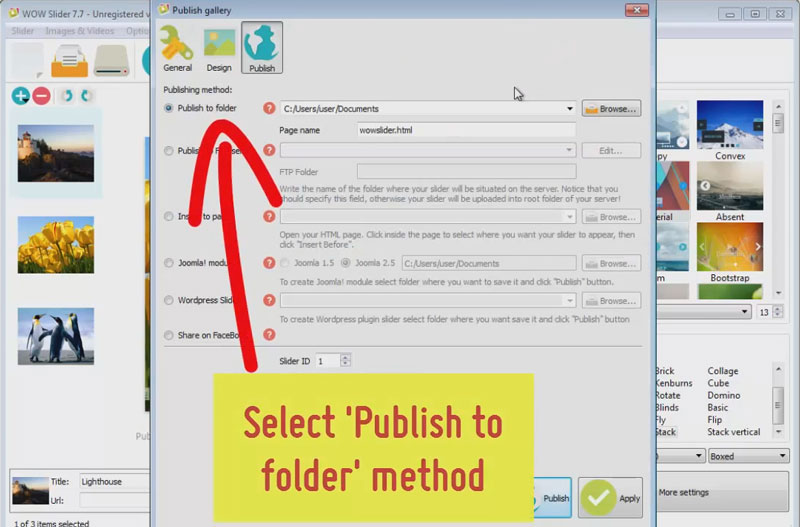
Choose 'Publish to folder' method and select the path where you want to save your slider.
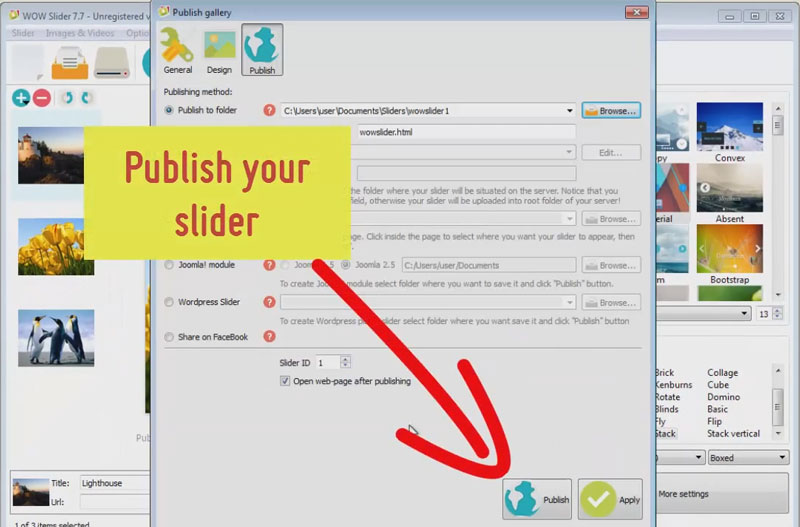
Publish your slider.
Now run the Microsoft Visual Studio and open your asp.net website.

You should copy the 'data1' and 'engine1' folders to your site folder. To do this open your Windows File Explorer. Then find the folder where you have just published the slider. Drag&Drop 'data1' and 'engine1' folders to the Solution Explorer in Visual Studio.

Now open the wowslider-howto.html file and copy the code for the HEAD section.
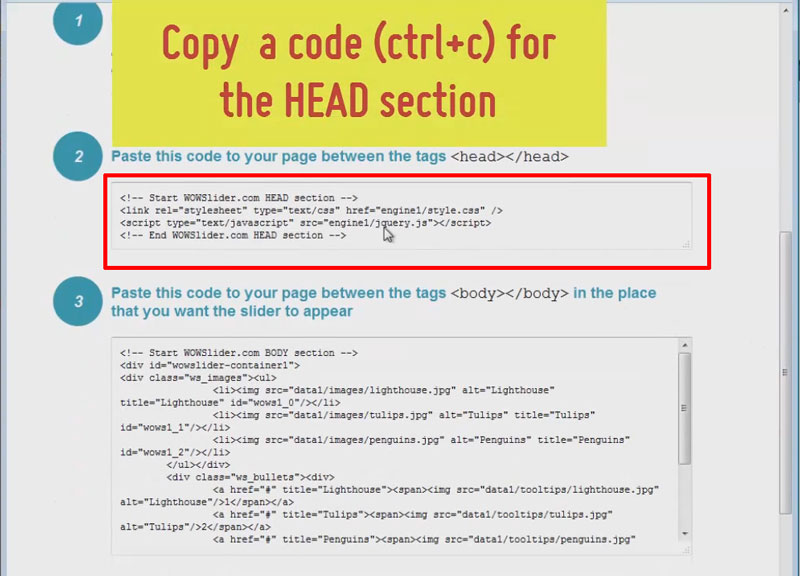
Paste it in HEAD section (HeaderContent) of your asp.net page.

Go back to the wowslider-howto file and copy a code for the BODY section.
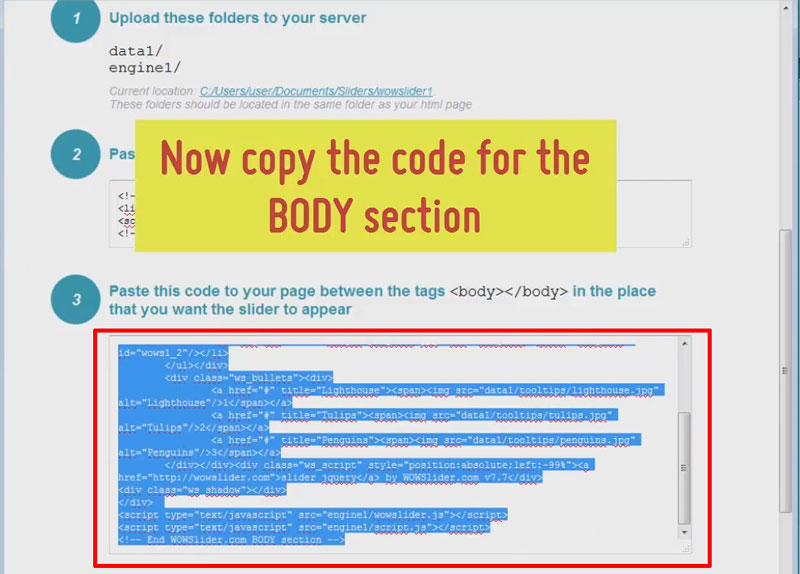
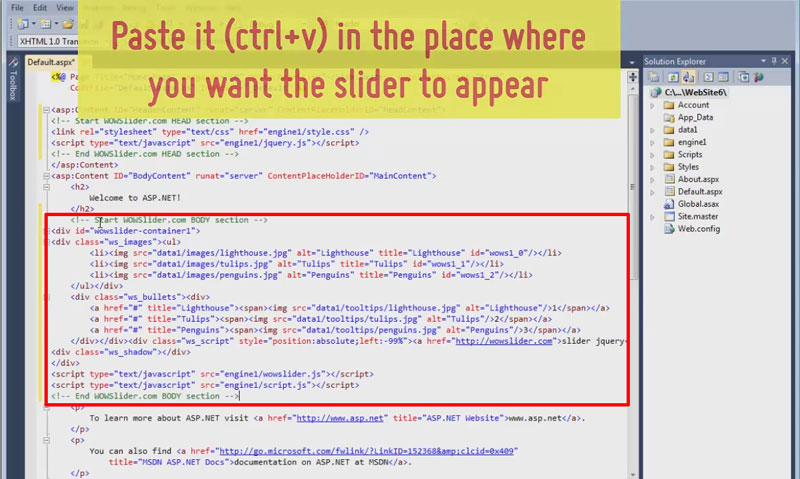
Paste it inside the BODY section (BodyContent) of your web page at the place where you want to add the slider.
Now preview your asp.net website and check that your slider works well.