- WebsiteBaker
- API
- Google Drive
- Google Sites
- Yahoo SiteBuilder
- Issue
- Mobile
- Customizing
- Tutorial
- Watermark
- Free Download
- Crack
- Dreamweaver
- Xara
- Coffeecup
- Blogger
- Iweb
- Wordpress
- Video Tutorial
- Weebly
- PHP
- ASP.NET
- Joomla
Slider Demos
-
 bootstrap carousel
Bootstrap Design
with Shift Animation
bootstrap carousel
Bootstrap Design
with Shift Animation
-
 jquery image slider
Fill Theme
with Basic Animation
jquery image slider
Fill Theme
with Basic Animation
-
 jquery slideshow
Flat Theme
with Slices Transition
jquery slideshow
Flat Theme
with Slices Transition
More Demos: Bootstrap carousel, Slick slider, Bootstrap slider, HTML slider, Slick carousel, Bootstrap carousel, HTML slideshow, CSS Slideshow, jQuery carousel, Image carousel
How can I add WOWSlider into an existing HTML page?
WOWSlider makes it very easy to add a slideshow into an exisiting HTML webpage. There are two methods to use. The first method does not require any HTML knowledge and makes the whole process extremely simple.
The second method works if you are comfortable working with HTML and want to have more control over the final webpage.
Method 1: Visual "Insert to page"
The first way is to use the ‘insert-to-page’ wizard. This is a great method if you are not comfortable working with HTML code directly and makes the whole process extremely simple.
First, make sure your slideshow is completed, and ready to be published.
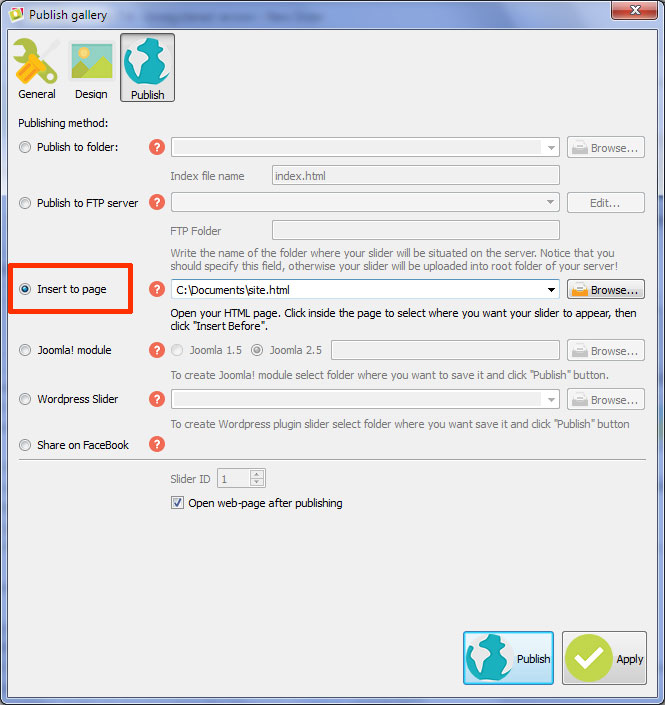
Click on the ‘Insert to page’ button in the navigation bar at the top of the screen.

Also you can click 'Publish' and select 'Insert to page' method.
Navigate to the page you want to add the slideshow to and click ‘open’.
The webpage will open inside WOWSlider. Click somewhere on the page where you want the slideshow to appear.
The HTML will appear in the sidebar. You can choose to insert the WOWSlider either before or after the HTML element you have selected. So, far example, if you clicked on a paragraph of text, you can choose to have the slider appear either before or after the <P> tag.
If you are unsure, it is probably better to insert before the element you have clicked on.
Click on either the ‘before’ or ‘after’ button.
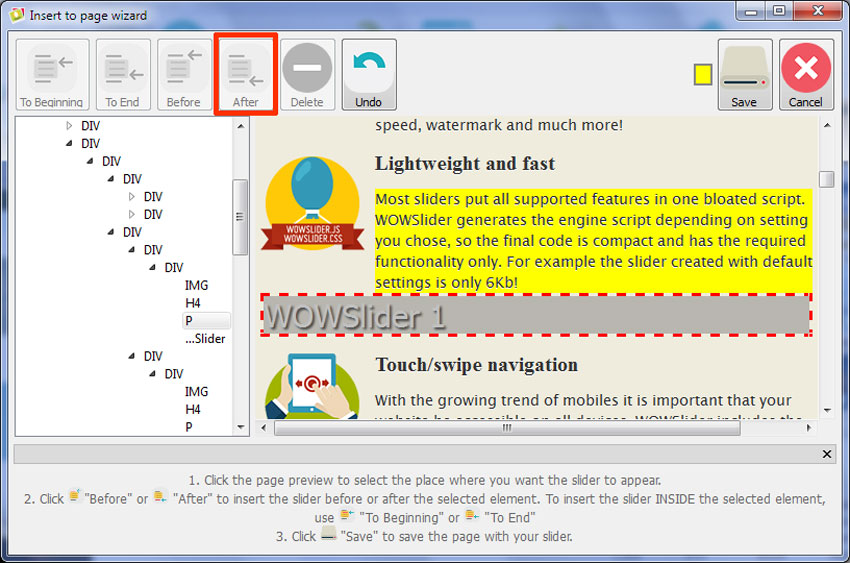
The code block will be inserted and you’ll be able to see where the slideshow will appear on the webpage. If you are happy with the location, click on the ‘save’ button.
The webpage will now open in a browser window for you to check that the slideshow looks and works how you would want.
You will need to upload the webpage along with the ‘data1’ and ‘engine1’ folders to your web-server.
Method 2: Save as HTML
The second method requires you to export your slider as HTML. You can save your slideshow by using the ‘Save HTML’ button in the top navigation bar.

Or click 'Publish' and tick 'Publish to folder' method.
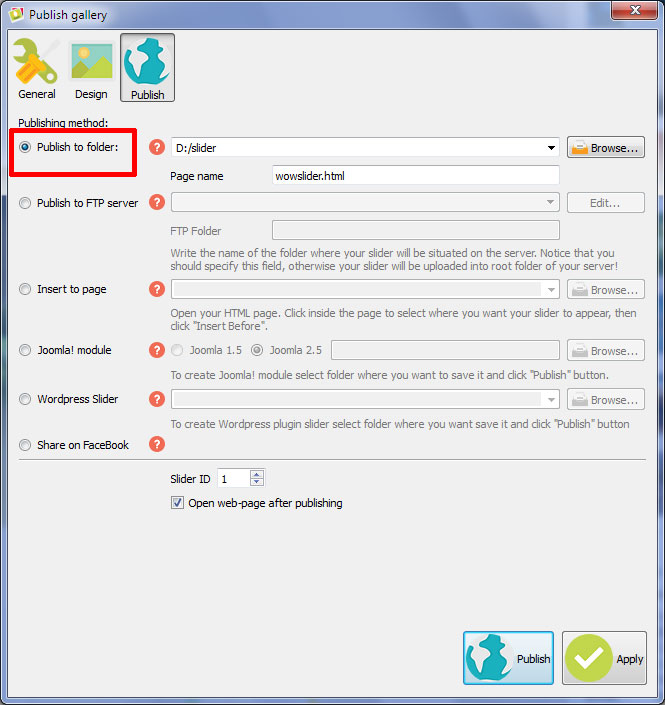
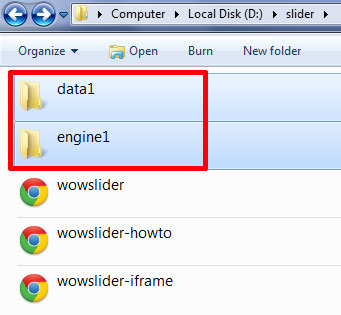
This will export the slider as a .html file and create two folders called ‘data1’ and ‘engine1’ which contain all the images and script files that the slideshow needs to work.
First of all you will need to upload the folder called ‘data1’ and ‘engine1’ into the same directory as the webpage you want the slider to appear, or you will need to edit the file paths to point to the correct location.
Open the wowslider-howto.html file and the .html file for the page you want to add your slideshow to. Use whatever your preferred plain text editor is. If you’re not sure, you can just use Notepad or Notepad++.
You will need to copy and paste the relevant sections from the wowslider-howto.html file into the right place in your exisiting HTML page.
The first thing you need to do is copy the code for the HEAD section. This contains the links to the script files.
Copy the section between
<!-- Start WOWSlider.com HEAD section -->and
<!-- End WOWSlider.com HEAD section -->Paste this code into the HEAD section of your page HTML code. It doesn’t matter where, as long as it is somewhere between the <head> and </head> tags.

The next thing you need to do is copy the code for the BODY section. This contains the actual slideshow image files. Ideally, this should be pasted into a preexisting <div> in the place that you want the slideshow to appear but this is not essential. It simply might help you manage the positioning of the slideshow more easily.
Copy everything between
<!-- Start WOWSlider.com BODY section -->and
<!-- End WOWSlider.com BODY section -->This should all be pasted in the BODY of your HTML, at the place you want the slideshow to appear.
Now open your page in a browser and check if the slider works and looks correctly.
If all is OK, upload the page along with the ‘data1’ and ‘engine1’ folders to your web server.