- WebsiteBaker
- API
- Google Drive
- Google Sites
- Yahoo SiteBuilder
- Issue
- Mobile
- Customizing
- Tutorial
- Watermark
- Free Download
- Crack
- Dreamweaver
- Xara
- Coffeecup
- Blogger
- Iweb
- Wordpress
- Video Tutorial
- Weebly
- PHP
- ASP.NET
- Joomla
Slider Demos
-
 slideshow html
Shuffle Template
with Rotate Effect
slideshow html
Shuffle Template
with Rotate Effect
-
 css3 image slider
Book Design
with Book Transition
css3 image slider
Book Design
with Book Transition
-
 html slider
Calm Layout
with Ken Burns Transition
html slider
Calm Layout
with Ken Burns Transition
More Demos: Bootstrap carousel, Slick slider, Bootstrap slider, HTML slider, Slick carousel, Bootstrap carousel, HTML slideshow, CSS Slideshow, jQuery carousel, Image carousel
How do I set my own watermark in WOWSlider?
You can only change the watermark if you have a commercial license for WOWSlider. You will need to enter your license key to register WOW Slider before you can change the watermark.
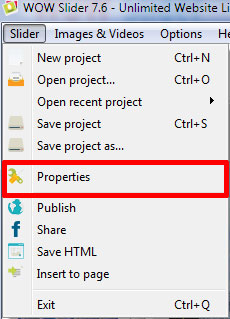
Once you have registered your copy of WOWSlider, you can upload your own watermark by opening the ‘Properties window. Go to the menu bar and click on ‘Slider’ and then ‘Properties’.
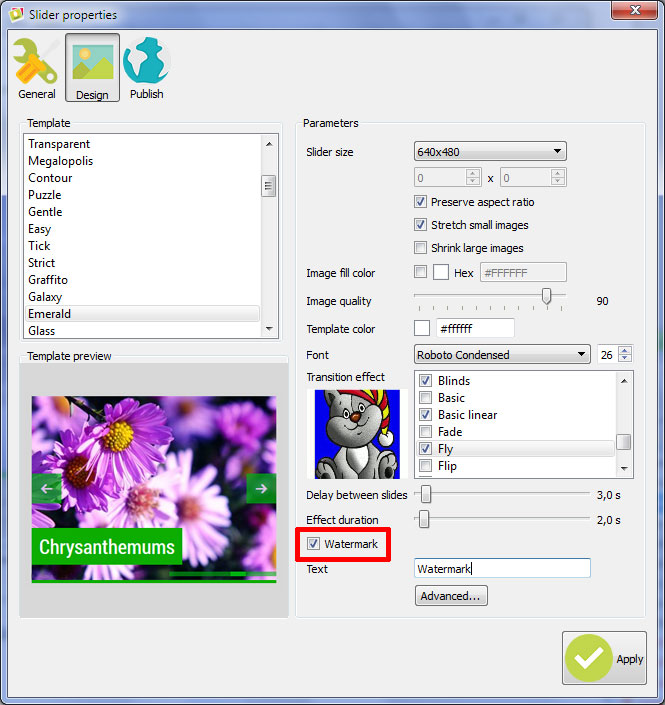
When the Properties window opens, click on the ‘Design’ tab at the top of the window.
At the bottom of the right-hand column is a checkbox that says ‘Watermark’. Make sure the box is checked, and then click on the ‘Advanced’ button below.
In the ‘Watermark Settings’ window that opens you have a wide variety of settings. You can enter text, such as your website name or your own name. You can select the font and the font-size. You can give your text a variety of background colors.
If you would rather use an image for your watermark (such as a logo) then you should click on the ‘Image’ radio button. You can either paste a file-path straight into the text box, or click on the button next to the text box to open a Open File window.
Below the watermark section is a section titled ‘Position and Appearance’. Here you can decide where on the slideshow you want the watermark to appear, and how much space from the edge of the slide you would prefer.
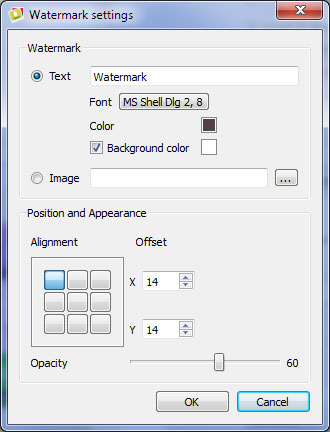
You can also change the opacity (transparency) of the watermark. By default, the watermark is semi-transparent. Move the slide up to 100 for a completely solid watermark, or closer to 0 for a more transparent watermark.
When you are happy with the settings, click on the ‘OK’ button and then on the ‘Apply’ button.
You should then re-save your slideshow and upload it to your site to get the version with your custom watermarks.